
Threaded plumbing connections appear simple but often leak without proper sealing. Teflon tape, also called thread seal tape or PTFE tape, provides an effective solution that’s easy to apply once you understand the technique.
This thin, white tape wraps around male threads to fill microscopic gaps and prevent water from seeping through connections. Whether you’re installing a new faucet, connecting a showerhead, or working on pipe fittings, proper Teflon tape application ensures leak-free results. For complex plumbing projects or persistent leak issues, consulting a nashville plumber ensures professional-grade results and long-term reliability. This guide walks you through everything you need to know about using Teflon tape effectively.
What Is Teflon Tape and Why Do You Need It?
Teflon tape is a thin, flexible film made from polytetrafluoroethylene (PTFE), the same material used in non-stick cookware coatings. Its unique properties make it ideal for sealing threaded plumbing connections.
The material is highly inert and doesn’t react with water, chemicals, or most substances found in plumbing systems. This chemical stability ensures the tape maintains its sealing properties indefinitely without degrading or breaking down.
Extremely low friction characterizes Teflon’s surface. This allows threaded connections to tighten smoothly without binding or galling. The tape actually makes assembly easier while simultaneously improving the seal.
Threads create seal points where male and female components meet. However, machining tolerances leave microscopic gaps between thread peaks and valleys. Without sealant, water finds pathways through these tiny spaces.
Teflon tape fills these microscopic irregularities, creating a continuous barrier. When you tighten the connection, compression forces the tape into gaps, conforming perfectly to thread contours.
Temperature resistance allows Teflon tape to function across wide temperature ranges. Standard white tape handles temperatures from -450°F to 500°F, covering virtually all residential plumbing applications.
The tape also acts as a lubricant during assembly. This reduces the torque required for proper tightening and prevents damage to threads, particularly important for plastic fittings that crack under excessive force.
Chemical compatibility means Teflon tape works with water, natural gas, propane, most chemicals, and petroleum products. Different tape types exist for specific applications, but basic white tape handles most residential plumbing needs.
Types of Teflon Tape: Choosing the Right One
Several Teflon tape varieties exist, each designed for specific applications and pipe sizes.
White Teflon tape is the standard choice for most plumbing projects. It’s designed for water lines, comes in various widths, and handles cold and hot water applications. Most residential plumbing uses white tape rated for water systems.
Thickness varies even within white tape options. Standard density tape works for most applications. High-density versions provide extra sealing power for larger pipes or higher pressure systems.
Yellow Teflon tape designates gas line applications. It’s thicker than white tape and specifically rated for natural gas and propane connections. Never substitute white tape on gas lines as it may not provide adequate sealing for gas molecules.
Gas tape often includes printing indicating its purpose. This helps prevent accidental use of wrong tape types. Some jurisdictions require yellow tape for gas applications as part of code compliance.
Pink Teflon tape is engineered for potable water systems. It meets specific NSF-61 standards for drinking water contact. While white tape generally works for water, pink tape provides additional assurance for drinking water applications.
Green Teflon tape handles oxygen systems in medical applications. Residential plumbers rarely encounter this type, but it’s mentioned for completeness. Never use standard tape in oxygen systems due to combustion risks.
Tape width affects application ease and sealing effectiveness. 1/2-inch tape suits small pipes up to 1/2 inch. 3/4-inch tape works for 3/4-inch to 1-inch pipes. 1-inch wide tape handles larger pipes up to 2 inches.
Thread size considerations guide tape selection. Smaller threads need narrower tape that doesn’t bunch up. Larger threads accommodate wider tape for better gap filling. Match tape width to your pipe size for optimal results.
Tools and Materials You’ll Need
Gathering everything before starting ensures smooth, efficient work without interruptions.
Teflon tape appropriate for your application forms the core material. Purchase the correct color and width for your specific project. One roll typically handles multiple connections, so buying extra is cost-effective.
Pipe wrenches or adjustable wrenches tighten connections to proper torque. Size your wrench appropriately for the fitting. Two wrenches allow you to hold one fitting while tightening the other, preventing pipe rotation.
Clean rags remove old tape residue, dirt, and thread debris. Clean threads ensure proper tape adhesion and optimal sealing. Keep several rags handy throughout the project.
Wire brush scrubs stubborn debris from threads. Brass or steel brushes clean metal threads effectively. Nylon brushes work for plastic threads without causing damage.
Bucket or towels catch residual water when disconnecting existing connections. Drain lines before disassembly when possible. Place absorbent materials under work areas to contain spills.
Pipe thread compound serves as an alternative or supplement to Teflon tape in some applications. Some plumbers use both tape and compound for extra sealing power on larger pipes or higher pressure systems.
Flashlight or headlamp illuminates dark spaces under sinks, in crawl spaces, or behind fixtures. Good visibility ensures proper tape application and helps you spot potential problems.
Safety glasses protect eyes from debris during disassembly and cleaning. Rust particles, old sealant, and water spray pose eye hazards. Always wear eye protection during plumbing work.
Step-by-Step: How to Apply Teflon Tape Correctly
Following the proper procedure ensures effective sealing and prevents common application errors.
Step 1: Clean the threads thoroughly. Remove any old tape, thread compound, rust, or debris from male threads. Use a wire brush and rag to expose clean metal or plastic. Dirty threads prevent proper tape adhesion and create leak paths.
Inspect threads for damage after cleaning. Crossed, stripped, or damaged threads may not seal properly even with Teflon tape. Consider replacing fittings with compromised threads.
Step 2: Identify the direction of wrapping. Hold the fitting with threads pointing toward you. You’ll tighten the connection by turning clockwise (righty-tighty). The tape must wrap in this same clockwise direction.
This critical detail prevents tape from bunching or unwrapping during assembly. When you tighten clockwise, the motion should pull the tape tighter, not unwind it.
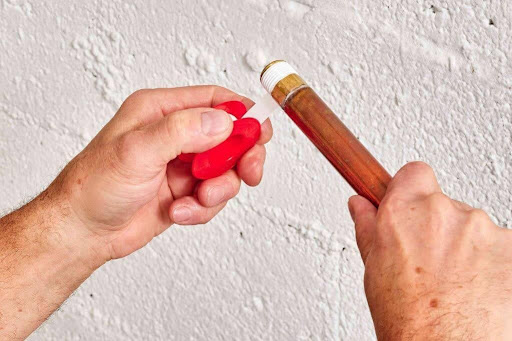
Step 3: Start the tape correctly. Hold the tape roll in your dominant hand and the fitting in your other hand. Place the tape end on the second or third thread from the end, not at the very tip.
Press firmly to anchor the tape. Wrap clockwise around the threads, overlapping each previous wrap by about 50%. Maintain consistent tension to prevent gaps or bunching.
Step 4: Apply the proper number of wraps. Most applications require 3-5 complete wraps around the threads. Smaller pipes (1/2 inch and under) typically need 3-4 wraps. Larger pipes benefit from 4-5 wraps.
Too little tape leaves gaps that leak. Too much tape prevents proper tightening and can actually cause leaks by preventing threads from engaging properly. Find the balance through experience.
Wrap beyond the threads onto the smooth pipe section slightly. This prevents tape from catching during assembly. Smooth down the tape as you wrap, pressing it into thread valleys.
Step 5: Complete the wrap and assemble. When you’ve applied adequate wraps, tear or cut the tape. Smooth the end down firmly so it doesn’t catch during insertion. Rub your finger over the entire wrapped section to press the tape into threads.
Immediately assemble the connection while the tape is fresh. Insert the male fitting into the female fitting and hand-tighten first. Once hand-tight, use wrenches to tighten further until snug but not over-tightened.
Common Mistakes to Avoid When Using Teflon Tape
Understanding frequent errors helps you achieve leak-free connections on the first attempt.
Wrapping in the wrong direction is the most common mistake. Counterclockwise wrapping causes tape to bunch up and unwind during tightening. Always wrap clockwise when viewing threads head-on.
Using too much tape prevents threads from engaging properly. Excessive tape acts as a spacer, keeping threads from meshing. The connection may feel tight but leave gaps where water leaks through.
Indicators of too much tape include difficulty starting threads, cross-threading, or inability to fully tighten the connection. If assembly feels wrong, remove the tape and start over with fewer wraps.
Applying too little tape leaves gaps where water escapes. Skimpy application doesn’t fill thread irregularities adequately. Most leaks from Teflon tape jobs result from insufficient tape rather than too much.
Wrapping female threads is incorrect and ineffective. Teflon tape belongs only on male threads. The compression during tightening must force tape into thread gaps, which only works when tape starts on male threads.
Covering too many threads at the end creates problems. Leave the first thread or two at the tip unwrapped. This prevents tape from tearing and bunching when threads initially engage.
Using wrong tape types for specific applications creates hazards. White water tape on gas lines may not seal gas molecules adequately. Always match tape type to your application.
Not cleaning threads first prevents proper adhesion. Old tape residue, rust, and debris create uneven surfaces where new tape can’t seal effectively. Always start with clean threads.
Stretching tape excessively during application thins it and reduces effectiveness. Apply with moderate, consistent tension. The tape should press into threads without becoming transparent from over-stretching.
Testing Your Connection and Fixing Leaks
Proper testing confirms your work before putting the system into regular use.
Visual inspection before pressurizing identifies obvious problems. Look for tape extending beyond threads, bunched tape, or cross-threaded connections. Correct issues before proceeding.
Initial pressurization should be gradual. Turn water on slowly and watch connections for leaks. Quick pressurization can damage fittings or blow out poorly sealed connections.
Observing for leaks requires patience. Some leaks appear immediately while others take minutes to manifest. Watch connections for at least 3-5 minutes after pressurization.
Differentiating condensation from leaks prevents unnecessary repairs. Wipe connections dry and watch closely. New water appearing indicates leaks. Dampness that doesn’t increase is usually condensation.
Minor weeping sometimes stops after connections settle. If you see very slight seeping, wait 10-15 minutes before taking action. Thermal expansion and contraction may close minor gaps.
Addressing active leaks requires disassembly and reapplication. Turn off water, drain the line, and disassemble the connection. Remove all old tape, clean threads thoroughly, and reapply fresh tape.
Tightening sequence matters when multiple connections exist. Tighten fittings progressively rather than fully tightening one before starting the next. This allows components to align properly without binding.
Final tightening should be firm but not excessive. Over-tightening cracks plastic fittings and damages threads. When resistance increases significantly, stop tightening. The connection should feel snug without requiring extreme force.
Marking successful torque helps maintain consistency across multiple connections. Many plumbers mark initial position with a marker and tighten a specific number of turns. This creates repeatable results.
When to Call a Professional Plumber
Certain situations exceed typical DIY scope and benefit from professional expertise.
Persistent leaks despite proper technique indicate underlying problems. Damaged threads, warped sealing surfaces, or cracked fittings won’t seal regardless of tape application. Professionals diagnose root causes DIYers might miss.
Complex multi-connection assemblies like shower valve installations involve numerous threaded connections in confined spaces. Professional experience ensures proper sequencing and prevents trapped components requiring complete disassembly.
High-pressure systems demand expertise beyond basic Teflon tape application. Water supply lines operating at 60+ PSI and gas lines require precise technique and appropriate materials. Errors create hazardous leaks.
Code compliance requirements vary by jurisdiction and application. Gas line work often requires licensed professionals. Water supply modifications may need permits and inspections. Professionals navigate code requirements seamlessly.
Lack of access to problem connections makes DIY repairs impractical. Pipes behind walls, under concrete slabs, or in other inaccessible locations require professional tools and expertise for efficient repair.
Time constraints make professional service practical when you need immediate repairs. Plumbers carry comprehensive parts inventories and complete repairs in hours rather than days of DIY trial and error.
Warranty considerations on new appliances and fixtures often specify professional installation. DIY work may void warranties, making professional installation worthwhile for expensive equipment.
Physical limitations or confined workspaces sometimes necessitate professional help. Plumbing work often requires awkward positioning and strength that may challenge some homeowners.