
Cabinet painting is one of the most effective ways to update the look of your kitchen, bathroom, or any room with cabinetry—without the expense of full replacement. Whether your cabinets look outdated, worn, or just need a refresh, painting them can completely change the ambiance of your space.
This article will guide you through everything you need to know about cabinet painting, including preparation, materials, techniques, and tips for achieving professional results. Whether you plan to tackle the project yourself or hire a pro, understanding the process helps ensure a beautiful, durable finish.
Why Choose Cabinet Painting?
Cabinet painting offers several benefits compared to replacing cabinetry:
- Cost-Effective: Painting cabinets is significantly less expensive than buying and installing new ones.
- Customizable: Choose from an endless range of colors and finishes to match your style.
- Sustainable: Repainting reduces waste and is an eco-friendly alternative to disposal.
- Time-Saving: The process is usually quicker than a full remodel.
- Increased Home Value: Fresh, modern cabinets can enhance your home’s appeal.
Types of Cabinets Suitable for Painting
Most cabinet materials can be painted with the right preparation, including:
- Solid Wood: Easy to paint but may require sanding and priming.
- Plywood and MDF (Medium-Density Fiberboard): Common in modern cabinets, these require sealing before painting.
- Laminate or Veneer: These surfaces need special primers to help paint adhere properly.
- Thermofoil: Requires careful sanding and primers designed for plastic-like surfaces.
Tools and Materials You’ll Need for Cabinet Painting
Before starting, gather these essentials:
- Paint stripper (if removing old paint or finish)
- Sandpaper (various grits) or a sanding block
- Tack cloth to remove dust
- Primer suitable for your cabinet material
- High-quality paint (latex, oil-based, or acrylic enamel)
- Paint brushes (angled sash brush) and foam rollers
- Painter’s tape
Screwdriver or drill to remove hardware - Drop cloths and protective gear (gloves, mask, goggles)
Step-by-Step Guide to Painting Cabinets
1. Remove Cabinet Doors and Hardware
Remove all doors, drawers, and hardware (handles, knobs, hinges). Label each piece to make reassembly easier.
2. Clean Thoroughly
Use a degreaser or mild detergent to remove grease, dirt, and grime. Clean surfaces must be dry before proceeding.
3. Sand the Surfaces
Sand all surfaces to remove the old finish and create a smooth surface for the primer to stick. For laminate or glossy finishes, sanding is especially important.
4. Wipe Away Dust
Use a tack cloth or damp rag to remove all dust from sanding.
5. Apply Primer
Apply a primer designed for your cabinet material to improve paint adhesion and durability. Use a brush for edges and a roller for flat surfaces.
6. Sand Lightly Between Coats
Once the primer dries, lightly sand again to smooth out imperfections.
7. Paint the Cabinets
Apply your chosen paint in thin, even coats. Multiple thin coats are better than one thick coat. Use a high-quality brush or foam roller for a smooth finish.
8. Allow Proper Drying Time
Let each coat dry fully before applying the next. This helps prevent peeling or uneven texture.
9. Reassemble Cabinets
Once the paint is fully cured (which can take several days), reattach hardware and reinstall doors and drawers.
Tips for a Professional Finish
- Work in a well-ventilated space to help paint dry evenly and reduce fumes.
- Use a quality primer and paint to ensure durability and resistance to chips and scratches.
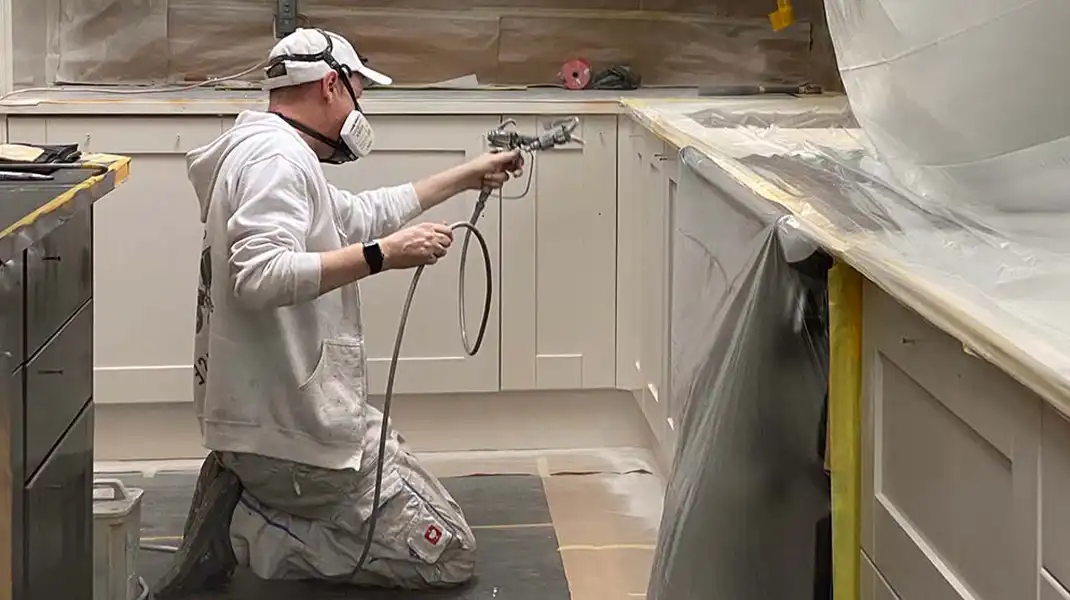
- Consider a spray finish for an ultra-smooth look if you have the tools and skill.
- Don’t rush between coats — patience leads to better results.
- Keep humidity low while painting, as moisture can affect drying.
Common Mistakes to Avoid
- Skipping primer or using the wrong type.
- Applying thick coats causing drips and runs.
- Not sanding properly leading to poor adhesion.
- Painting over dirty or greasy surfaces.
- Ignoring drying times between coats.
How Long Does Cabinet Painting Last?
With proper prep and quality materials, painted cabinets can last 7-10 years or more. Regular cleaning with gentle products helps maintain the finish.
DIY vs. Hiring a Professional
DIY Cabinet Painting:
- Pros: Cost-saving, control over color and timing, satisfying personal project.
- Cons: Time-consuming, requires skill and patience, risk of mistakes.
Professional Cabinet Painting:
- Pros: Expert finish, faster results, warranty on work, less hassle.
- Cons: Higher upfront cost, less control over timing.
Conclusion
Cabinet painting is a smart and affordable way to breathe new life into your home’s cabinetry. Whether you choose to do it yourself or hire professionals, understanding the materials, preparation, and techniques ensures your cabinets look stunning and stand up to daily use.
A fresh coat of paint can transform your kitchen, bathroom, or any space with cabinets — creating a welcoming, updated atmosphere that enhances your home’s style and value.